Learn
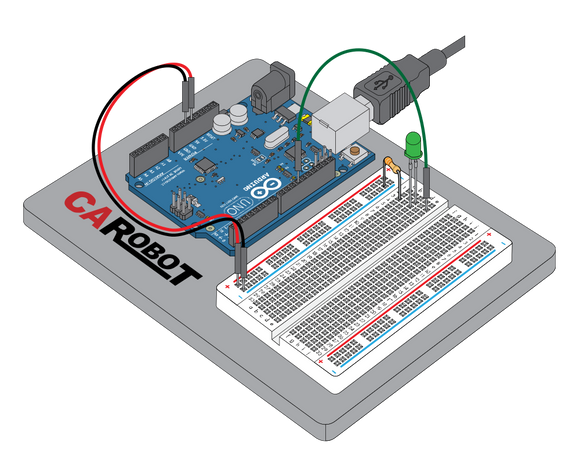
Project 3: Music Box
Posted by Rhiannon L on

 Today, you’ll learn to program something your Arduino to play a tune when you press the button! This project uses a buzzer, which is a small piece of technology that makes a little "click" when you apply voltage to it. If you turn the voltage on and off hundreds of times a second, the buzzer will produce a tone, and if you string together a bunch of tones, you've got music!
Project 2: Rocket Launch Initiator
Posted by Rhiannon L on

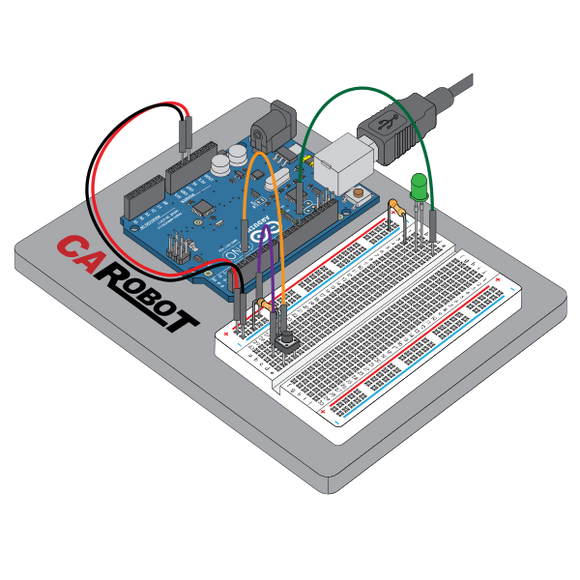 Have you ever heard the phrase “it’s not rocket science”? Rocket science is a difficult field of study. While you won’t have an actual rocket to launch, in this project you’ll make a program that, when the button is pushed, turns on a light, just like a rocket launch initiator that illuminates a series of lights in preparation for liftoff.
An Introduction to Arduino
Posted by Rhiannon L on

 Using an Arduino for the first time can be overwhelming. You might be looking at this tiny device and wondering “what the heck is going on here!?” Today's post is about helping you understand your Arduino and get set up. This series of posts will guide you through your journey with Arduino with easy-to-follow projects to help you get the basics down.
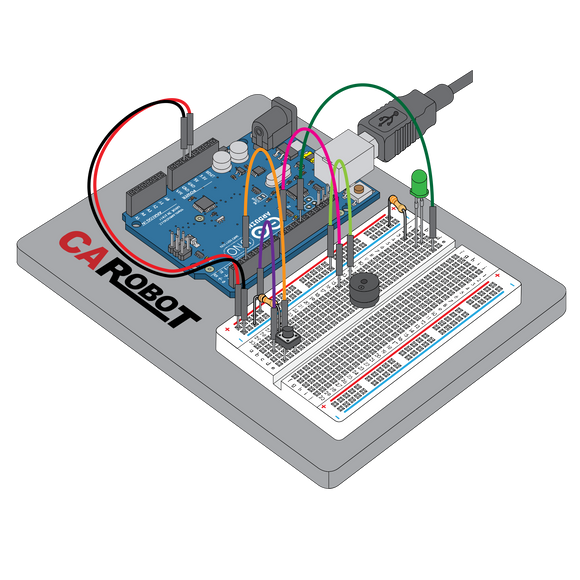
Project 1: Airplane Strobe Light
Posted by Rhiannon L on

 Have you ever wondered how planes are able to see each other at night? In addition to their RADAR, they also use strobe lights. In this simple introductory project, you’ll learn to program an LED to blink on and off like the strobe light of an airplane.
How to tell which Raspberry Pi 4 RAM size do I have?
Posted by Jack L on

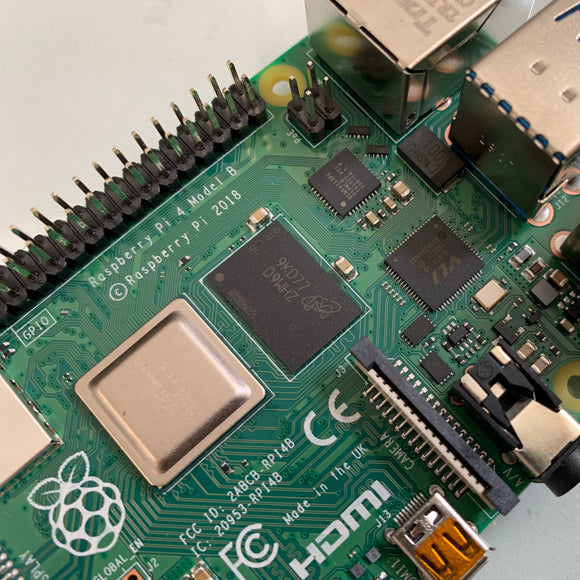
So...which Raspberry Pi 4 RAM size do I have? If your Raspberry Pi is already up and running, you can easily check for the memory size within the OS (Raspbian or Raspberry Pi OS) by running the followig command in terminal: free -h However, if your Raspberry Pi is sitting in front of you right now, you can simply look at the marking on the RAM chip. Refer to the picture below (2GB version shown): At the time of writing, the marking code is as follows: 1GB - 4HBMGCJ 2GB - D9WHZ 4GB - D9WHV 8GB - D9ZCL Have fun!
- 13 comments
- Tags: Raspberry Pi