Learn — Microcontroller
CAROBOT Motor Shield V3 Guide
Posted by Kelly M on

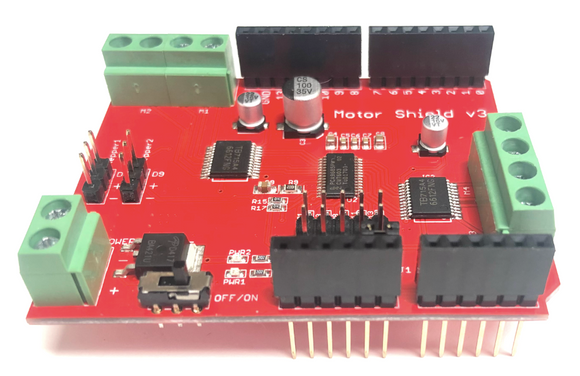
The CAROBOT Motor Shield allows you to easily control motor direction and speed using an Arduino. By allowing you to simply address Arduino pins, it makes it very simple to incorporate a motor into your project. It also allows you to be able to power a motor with a separate power supply of up to 12v. For all of these reasons, this motor shield is a popular device that is commonly used in projects, such as robot cars, and much more. In this article, we will talk about the setup and operation of the CAROBOT Motor shield with Arduino. ...
- 0 comment
- Tags: Arduino, CAROBOT, Guide, Learn, Microcontroller, Motor Shield V3
HC-SR04 Ultrasonic Sensor Guide
Posted by Kelly M on

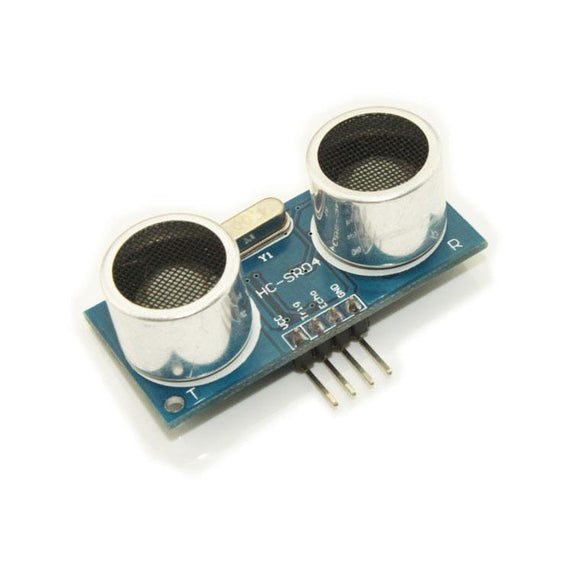
The HC-SR04 ultrasonic sensor module is a very popular module for measuring distance or any other purposes. It emits an ultrasound signal at about 40 000 Hz which travels through the air and if there is an object or obstacle along its path, the sound will bounce back to the module. In this article, we will talk about how to wire and set up the module for operation with an Arduino Board. Wiring Most HC-SR04 modules operate at 5V and gives out digital outputs. For this project, we will be using the HC-SR04 Ultrasonic Sensor module we carry in our shop. This module consists...
- 0 comment
- Tags: Arduino, CAROBOT, Guide, HC-SR04, Learn, Microcontroller, Ultrasonic Sensor
Line Following Robot Car Using Arduino
Posted by Kelly M on

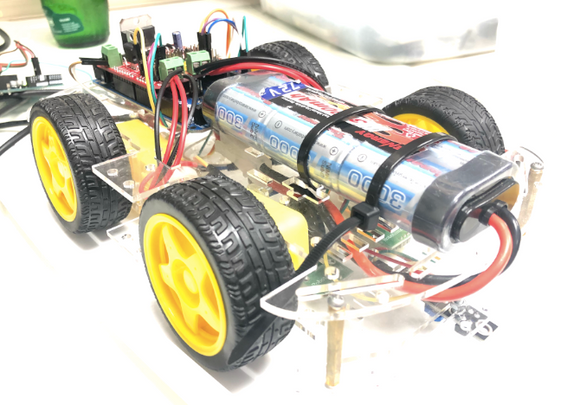
In this article, we will guide you on making a robot car that can follow a line. We will be using the parts that we carry in our shop. We will be using CAROBOT Motor Driver and Servo Shield to make connected Motors to Arduino UNO. The shield separate the Uno's PWM digital pins (3,5,6,9,10,11) and the non-PWM digital pins (2,4,7,8,12,13) for easy identification. Furthermore, it provides a 5V and GND rail for easy connections. The Motor and Shield shield is equipped with an L298N H-Bridge Motor Driver. This allows the shield to drive two DC motors. We will also be using...
- 0 comment
- Tags: Arduino, CAROBOT, Encoder, Guide, Infrared Sensor Module, Learn, Light sensor Module, Microcontroller, Motor Shield V3, Project
How to use a photocell module
Posted by Kelly M on

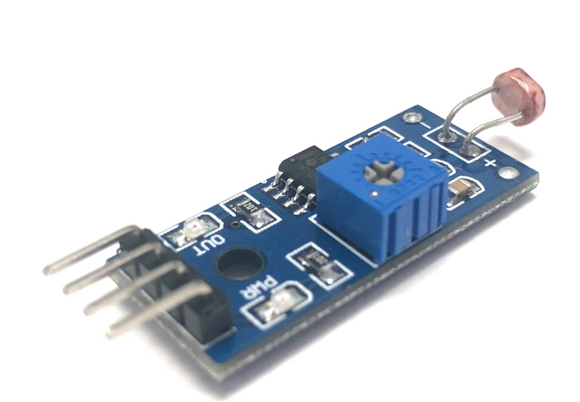
The light sensor is a photoresist, which is also known as a light-dependent resistor or photocell. It is used not only to detect light but also to measure the brightness or illuminance level of the ambient light. It has a wide range of applications, such as measuring the brightness of ambient light and controlling the lights turning on and off. How it works The more light the photoresist’s face is exposed to, the smaller its resistance is. Therefore, we know how bright the ambient light is by measuring the photoresistor’s resistance. In this article, we'll talk about the setup and wiring...
How to use a photodiode module
Posted by Kelly M on

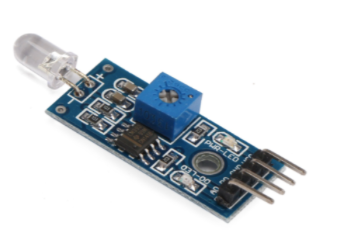
The Photodiode Module can be used for measuring brightness and ambient light intensity and is often used in robotics application. Compared to a photo-resistor, photodiode is better in directionality. Therefore, photodiode is better suited when searching for a light source whereas photoresistor is better for generic light intensity measurement. Wiring The photodiode module operates at 3.3V to 5V, and the digital output pin gives out a HIGH or LOW signal depending on the light intensity level. When ambient light intensity does not reach the threshold value, the "D0" port outputs a high lever; When the ambient light intensity exceeds a set threshold, the "D0" outputs a...
- 0 comment
- Tags: Arduino, CAROBOT, Guide, Learn, Light sensor Module, Microcontroller