MQ-3 Alcohol Ethanol Gas Sensor Guide
Posted by Kelly M on
The MQ-3 sensor is one of the most commonly used sensors in the MQ sensor series. It is a chemiresisotors because sensing is based on the change of resistance of the sensing material when it is exposed to alcohol.
In this article, we will talk about how to wire and set up the module for operation with an Arduino Board.

Wiring
MQ-03 alcohol sensor operates at 5V DC and draws around 800mW. It can detect alcohol concentrations anywhere from 25ppm to 500 ppm. It comes with both the digital and analog output pins. The analog output voltage provided by the sensor varies in proportion to the alcohol concentration. The higher the alcohol concentration in the air, the higher the output voltage; whereas lower concentration gives lower output voltage. The same analog signal is fed to a LM393 comparator to digitize it and is made available at the digital output pin.
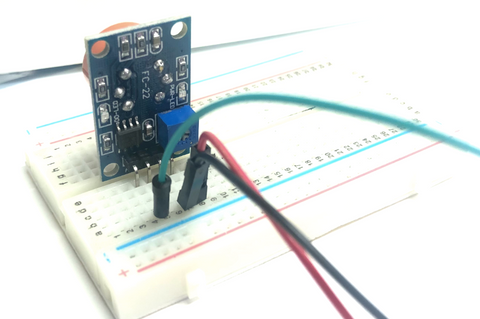
The sensor has a built-in potentiometer for adjusting the sensitivity of the digital output where it can be used to set a threshold, so that when the alcohol concentration exceeds the value, the sensor will output LOW otherwise HIGH. The sensor also comes with two LEDs, the power LED will light up when the sensor is powered, while the status LED will light up when the digital output goes LOW.

For this project, we will be using MQ-3 Alcohol Sensor, the one we carry in our shop. This module consists of 4 pins: VCC, A0, D0 and GND.
Parts
Wiring Guide
Connect the pins with male to male jumper wires on the breadboard
- MQ-3 VCC -- Arduino 5V pin
- MQ-3 D0 -- Arduino D7 pin
- MQ-3 GND -- Arduino GND pin


Programming
The code below demonstrates how the MQ-03 sensor works and detects alcohol. If you want to skip the steps and jump to the Full Code.
Step 1: Calibrate the sensor by blowing your alcohol breath on the sensor or squeeze the isopropyl alcohol bottle to breathe the vapours of the alcohol into the sensor and adjust the pot clockwise so that the Status LED is ON and then adjust the pot back counterclockwise just until the LED goes OFF.
Step 2: Define the connection pin.
#define sensor 7
Step 3: Create a variable for storing the sensor's value
int sensorValue; //variable to store sensor value
Step 4: Set up serial communication between Arduino and mq-03 sensor and set the sensor as an input.
void setup() {
  Serial.begin(9600); // sets the serial port to 9600
  pinMode(sensor, INPUT);
}
Step 5: Read the sensor's output
void loop() {
  sensorValue = digitalRead(sensor); // read digital output pin
Step 6: Print out the message accordingly.
Serial.print("Digital Output: ");
  Serial.print(sensorValue);

  // Determine the status
  if (sensorValue) {
    Serial.println("  |  Alcohol: -");
  } else {
    Serial.println("  |  Alcohol: Detected!");
  }
Step 7: Delay 2 seconds for the next reading.
  delay(2000); // wait 2s for next reading
}
Full Code
#define sensor 7

int sensorValue;  //variable to store sensor value

void setup() {
  Serial.begin(9600); // sets the serial port to 9600
  pinMode(sensor, INPUT);
}

void loop() {
  sensorValue = digitalRead(sensor); // read digital output pin
  Serial.print("Digital Output: ");
  Serial.print(sensorValue);

  // Determine the status
  if (sensorValue) {
    Serial.println("  |  Alcohol: -");
  } else {
    Serial.println("  |  Alcohol: Detected!");
  }

  delay(2000); // wait 2s for next reading
}
Output
When there is no alcohol detected

When alcohol is detected

Share this post
- 0 comment
- Tags: alcohol sensor, Arduino, Guide, Learn, Microcontroller, MQ-03