Learn — CAROBOT
How to use a photocell module
Posted by Kelly M on

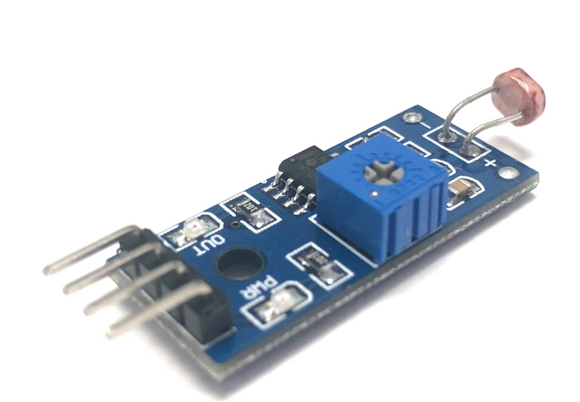
The light sensor is a photoresist, which is also known as a light-dependent resistor or photocell. It is used not only to detect light but also to measure the brightness or illuminance level of the ambient light. It has a wide range of applications, such as measuring the brightness of ambient light and controlling the lights turning on and off. How it works The more light the photoresist’s face is exposed to, the smaller its resistance is. Therefore, we know how bright the ambient light is by measuring the photoresistor’s resistance. In this article, we'll talk about the setup and wiring...
How to use a photodiode module
Posted by Kelly M on

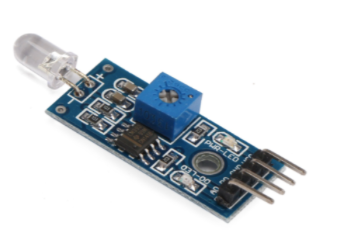
The Photodiode Module can be used for measuring brightness and ambient light intensity and is often used in robotics application. Compared to a photo-resistor, photodiode is better in directionality. Therefore, photodiode is better suited when searching for a light source whereas photoresistor is better for generic light intensity measurement. Wiring The photodiode module operates at 3.3V to 5V, and the digital output pin gives out a HIGH or LOW signal depending on the light intensity level. When ambient light intensity does not reach the threshold value, the "D0" port outputs a high lever; When the ambient light intensity exceeds a set threshold, the "D0" outputs a...
- 0 comment
- Tags: Arduino, CAROBOT, Guide, Learn, Light sensor Module, Microcontroller
How to use a HC-SR501 Sensor
Posted by Kelly M on

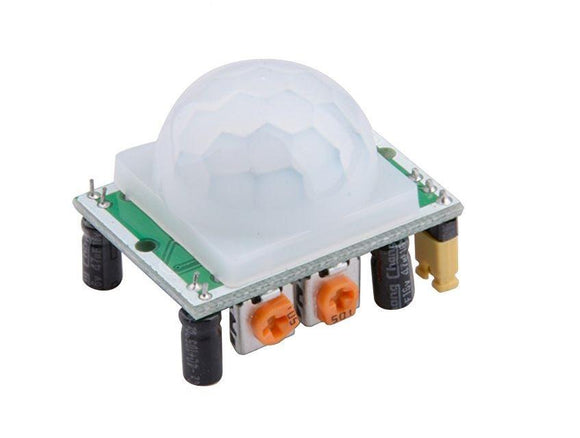
HC-SR501 is based on infrared technology, an automatic control module with high sensitivity and ultra-low-voltage operating mode, making it highly reliable to use. It is widely used in various auto-sensing electrical equipment, like battery-powered automatic controlled products. Wiring The HC-SR501 sensor operates at 5V to 20V, and the digital output pin gives out a HIGH or LOW signal depending on if the sensor detects any motions. Thus, the sensor can be used without connecting to a microcontroller and just by a power supply and a load. For instance, it can be connected to the power supply and a lightbulb. Then,...
- 0 comment
- Tags: Arduino, CAROBOT, Guide, HC-SR501, Learn, Microcontroller, Motion Sensor
Humidity and Temperature Sensor (DHT11) Guide
Posted by Kelly M on


The DHT11 is a basic, low- humidity and temperature sensor. It makes it really easy to add humidity and temperature data to your electronics projects. It is used for remote weather stations, home environmental control systems, and farm or garden monitoring systems. In this article, we will be talking about the set up and operating the sensor with an Arduino Board. The DHT11 sensor has some range and accurate for collecting data: If you want to know more, check out this DHT11 data sheet. Humidity Range: 20-90% RH Humidity Accuracy: ±5% RH Temperature Range: 0-50 °C Temperature Accuracy: ±2% °C Operating Voltage:...
- 0 comment
- Tags: Arduino, CAROBOT, DHT11 sensor, Learn, Microcontroller
Flame Sensor Module Guide
Posted by Kelly M on

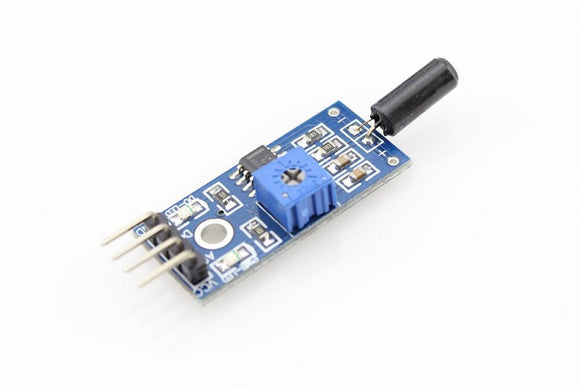
The flame sensor module consists of an IR receiver, resistor, capacitor, potentiometer, and a comparator LM393 in an integrated circuit. It can detect infrared light with a wavelength ranging from 700nm to 1000nm. The flame probe converts the light detected into the form of infrared light into current changes. The flame sensor module operates between 3.3V to 5V DC with a digital output that indicate the presence of a high infrared signal. When it is triggered, it will output a HIGH. How it works The flame sensor is very sensitive to IR wavelength. The analog output (A0) outputs a...